


Cycling capture and data workflow
DJI Osmo 360 II Cycling Guide: Sports Dashboard, Stabilization & Third-Person Shots Explained
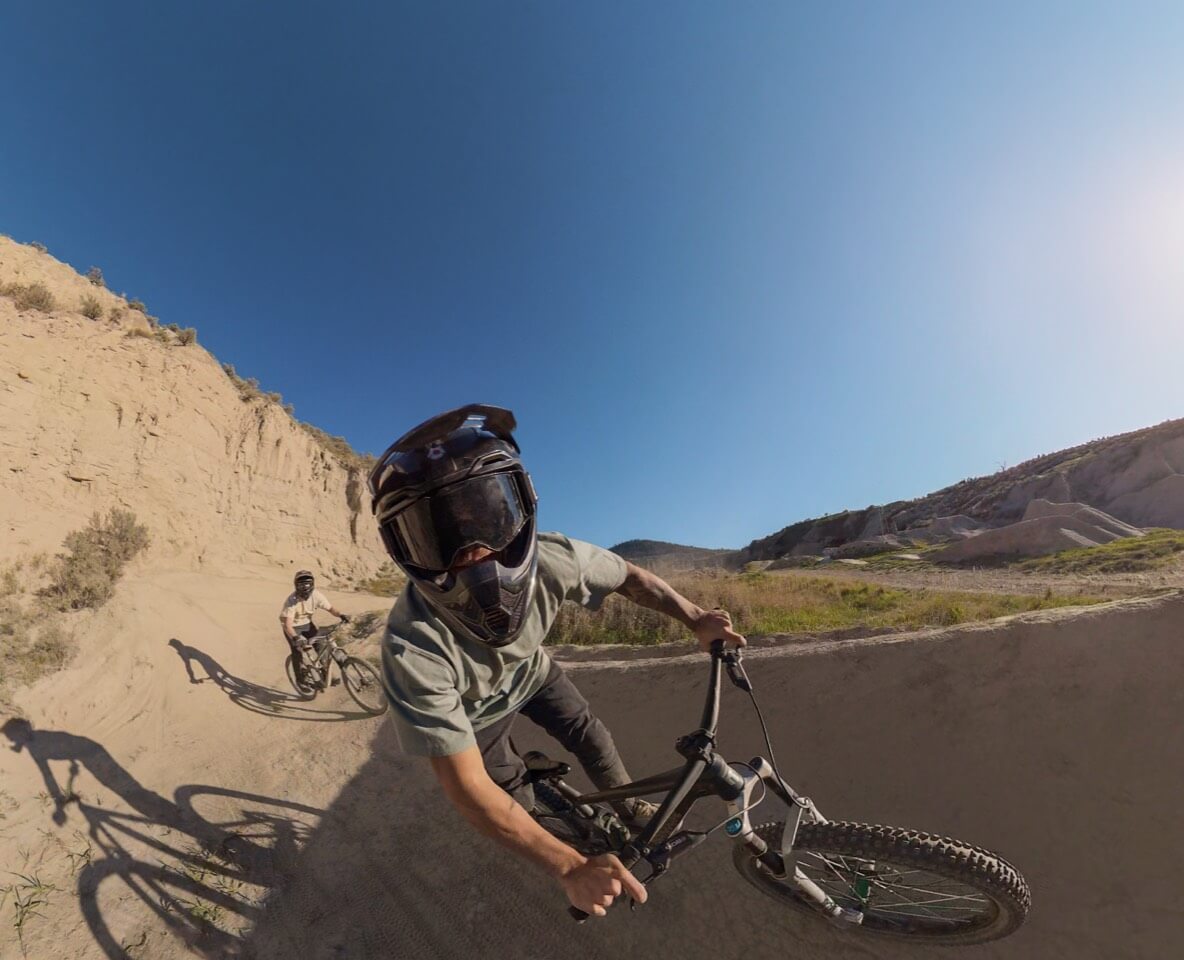
The best Osmo 360 II cycling setup depends on the ride. Use 360° when you want third-person angles or freedom to reframe after the route. Use Single-Lens for a direct, faster-to-edit POV. Record your Garmin, bike computer or FIT activity at the same time if you want Sports Dashboard overlays—those ride metrics come from synchronized data, not from the camera independently measuring your heart rate, power or cadence.
Choose by ride and deliverable
Quick Answer: Best Osmo 360 II Cycling Setup
Start with the angle you need, then select stabilization and data. The maximum setting is not automatically the best setting.
Swipe to see every column.
| Ride or output | Capture | Stabilization | Mount and data |
|---|---|---|---|
| Everyday road ride | 6K60 360° | HorizonSteady for a clean level view; RockSteady if you want lean to remain visible | Secure fixed mount; optional Garmin or FIT activity |
| Hero road-cycling sequence | 8K60 360° | Choose at export | Rear third-person setup only within DJI’s flat-road safety limits |
| Mountain biking | 8K60 or 6K60 360° | RockSteady often feels more dynamic; HorizonSteady gives a level reference | Low-profile off-road-appropriate mount; no long rear stick on the trail |
| Fast POV edit | Single-Lens 4K60 | RockSteady 3.0; HorizonSteady when the supported FOV and frame-rate conditions fit | Known forward composition; no reframing required |
| Reel or Short | 360° master → 9:16 | Set during export | Keep rider and key action away from the stitch line |
| Telemetry edit | Normal-speed video | Match the visual style above | Start sports recording first, stop it last, then import the data in DJI Mimo |
Why this camera fits the ride
Why Osmo 360 II Works Well for Cycling
Cycling changes direction quickly. A rider leans into a corner, a friend moves from behind to beside you, and a trail feature can pass before you decide where to point a conventional camera. A 360° recording preserves the scene around the camera so the final direction can be chosen later.
DJI lists road cycling and mountain biking as Osmo 360 II use cases and pairs them with stabilization and Sports Dashboard. The camera supports panoramic 8K60 and 6K60 recording, RockSteady 3.0 and HorizonSteady, plus 105GB of available built-in storage with microSD expansion. Those features help with the capture problem; a useful cycling video still depends on a safe mount, clean lenses, intentional reframing and disciplined clip length.
The buying reason is one ride, several useful angles. A single 360° master can become a forward POV, a rider-focused third-person shot and a vertical social crop. Single-Lens remains the more efficient choice when the forward view is all you need.
Do not reuse one mounting plan
Road Cycling vs Mountain Biking: Which Setup Should You Use?
Smoother pavement makes extended rear angles possible under controlled conditions. Off-road impacts demand a shorter, more protected setup.
Road cycling
Prioritize clean horizon and efficient footage
For a waterfront path such as Toronto’s Martin Goodman Trail or a smooth Vancouver route, 6K60 360° is a sensible starting point. It preserves a complete panoramic master without automatically choosing the largest files.
- Use a compact handlebar, stem or approved rear setup.
- Choose HorizonSteady for a calm level look.
- Use Sports Dashboard when the ride data adds a story.
- Check local rules before any mount extends behind or beside the bike.
Mountain biking
Prioritize retention, clearance and lens protection
On GTA mixed trails or a Whistler descent, impacts, branches and rider movement change the risk. Use a secure, low-profile mount rated for the surface and stop before adjusting it.
- Keep long poles and rear extensions off rough trails.
- Use RockSteady when bike lean and terrain should feel dynamic.
- Use 8K60 when the clip needs a tighter reframe; otherwise consider 6K60.
- Inspect both lenses and every fastener before each segment.
Ride data becomes a visual layer
What Is DJI Sports Dashboard?
Sports Dashboard is a DJI Mimo editing feature that matches supported activity data to your video and turns selected metrics into on-screen stickers or gauges.
Dashboard is an editing workflow, not a promise that Osmo 360 II has measured every displayed value. Speed, location, heart rate, power and cadence depend on the source data available for that activity.
Data availability matters
Which Cycling Data Can You Display?
DJI’s current cycling Dashboard support lists a broad set of fields. Your final overlay can only use values present in the connected activity or FIT file.
Route and ride
Speed, track direction, distance, altitude, slope and date. Route or direction needs valid latitude and longitude data.
Performance
Heart rate, power and cadence can appear when the sports device or paired sensors record those fields into the activity.
Camera and motion
G-force and tilt may be available for supported camera and software combinations. Confirm the current sticker list in DJI Mimo.
A bike computer alone may not provide every metric. Heart rate usually requires a heart-rate sensor; power requires a power meter; cadence requires a cadence source. DJI’s GPS Bluetooth Remote Controller does not collect those three values.
Two supported routes
How to Import Garmin, Bike Computer or FIT Data
DJI Mimo supports both service-linked and manual-file workflows for the Osmo 360 series. DJI’s current support article lists Garmin Connect integration from Mimo 2.1.0, while manual standard FIT import is supported from Mimo 2.0.8. App menus and supported services can change, so update Mimo and confirm the current interface before an important ride.
Garmin Connect or another listed service
Record and save the activity on the sports device, sync it to its service, then open the original camera clip in DJI Mimo. Enter Dashboard, authorize the supported account and choose the matched activity. DJI currently documents Garmin Connect outside Mainland China and also lists Apple Health and Huawei Health, with additional services added in later Mimo versions.
Manual FIT file
Export a standard FIT file from the bike computer, watch or fitness platform. In DJI Mimo, connect to the camera, open Album → Video → Dashboard → Import Files With Sports Data, select the file and then choose the cycling layout and stickers. For reliable matching, the file should include speed or enhanced speed; route needs latitude and longitude; altitude, distance and performance metrics each need their relevant fields.
Protect the time overlap
How to Keep Sports Dashboard Data Synced With Your Video
DJI Mimo matches an original video to the activity timeline. The sports recording should begin before the camera clip and end after it.
ACTIVITY
CAMERA
RECORD
CAMERA
ACTIVITY
Smooth does not mean identical
RockSteady 3.0 vs HorizonSteady for Cycling
Both reduce distracting shake, but they communicate motion differently. Choose by how the ride should feel.
RockSteady 3.0
Reduces shake while retaining more of the visual impact of movement. It is often the more natural choice when the rider’s lean, trail pitch or bike response is part of the story.
Good for: dynamic POV, mountain biking, aggressive corners and edits where a perfectly locked horizon would feel disconnected from the ride.
HorizonSteady
Corrects horizontal tilt to keep the view level. It can make road footage easier to watch and gives a stable reference when the camera rotates or the bike leans.
Good for: smooth road rides, route explainers, third-person follow views and clean social exports.
Panoramic workflow: DJI’s current specifications say stabilization for Panoramic Video is selected during export in DJI Mimo or DJI Studio. Single-Lens workflow: HorizonSteady availability depends on the recording family, FOV, aspect ratio and frame rate; check the current specs rather than assuming every 4K mode supports it.
Smooth pavement, intentional lean
Best Stabilization for Road Cycling
Start with HorizonSteady when the video is about the route, the rider or Dashboard data rather than the sensation of every corner. A level view is easy to watch on longer commuter, gran fondo or waterfront sequences. It also helps a rear third-person angle feel composed instead of continuously tilting with the bicycle.
Switch to RockSteady when lean is meaningful—for example, a short cornering sequence or a punchier Reel where the bike’s motion is part of the energy. Stabilization cannot repair a loose clamp, flexible extension or poor mounting surface. Solve mechanical movement first.
Let the trail still feel like a trail
Best Stabilization for Mountain Biking
RockSteady is a strong starting point for a forward-facing Single-Lens POV or a panoramic export that should preserve the character of the terrain. HorizonSteady can be useful when orientation is confusing or when a viewer needs a calm reference, but a completely level horizon may reduce the feeling of berms and bike lean.
Review a short test clip before the main descent. Watch the edges for vibration, confirm the fastener has not shifted and inspect both fisheye lenses. For trail filming, use a compact mount with adequate clearance; do not adapt DJI’s flat-road seatpost rear-stick setup to rough ground.
Make the camera feel detached
How to Shoot Third-Person Cycling Footage
The “camera following me” look comes from 360° stitching, a carefully aligned extension and a reframe that keeps the rider at a useful distance.
For a complete mode decision, see the Osmo 360 II Single-Lens vs 360° guide.

Treat the mount instructions as limits
How to Mount Osmo 360 II Behind Your Bike Safely
DJI lists the Osmo Bike Rear Mount Kit as compatible with Osmo 360 II and designed to pair with an Invisible Selfie Stick. The defining feature is dual-point support: the seatpost or saddle-area support is not enough by itself.
DJI requires the rear selfie-stick fixing clamp. Do not secure the stick using only the seatpost mount. Check the camera and every fastener before riding, because prolonged vibration can loosen a poorly secured setup.
DJI limits its seatpost mount to flat-road riding, recommends staying at or below 60 km/h, and says not to use it on mountain or muddy terrain. When mounted to the side, the stick must not extend wider than the handlebars; rear extension length and the entire installation must comply with local laws. Do not modify the accessory, and do not pair this kit with DJI’s 2.5 m ultra-long carbon-fibre stick.
Read DJI’s current Bike Rear Mount instructions before each installation.
Three different storytelling jobs
POV vs Third-Person vs 360° Reframing
These are not competing effects. A strong ride edit uses each only when it explains something the other angles cannot.
Swipe to see every column.
| Angle | Best for | Capture choice | Main limitation |
|---|---|---|---|
| Forward POV | Line choice, route, speed sensation | Single-Lens for speed or 360° for recovery options | Can feel repetitive and hides rider form |
| Third-person | Rider, bicycle and environment together | 360° with a properly aligned, surface-appropriate mount | Mounting and clearance require more care |
| Post-production reframe | Following a friend, changing direction, vertical and horizontal outputs | 8K60 or 6K60 panoramic master | Tighter crops reduce the effective flat-frame detail |
Useful defaults, not universal rules
Best Osmo 360 II Settings for Cycling
Pick the recording family first. Resolution, frame rate and stabilization should support the angle and post-production plan.
Swipe to see every column.
| Goal | Mode | Starting setting | Why |
|---|---|---|---|
| Maximum reframe room | Panoramic | 8K60 | Best starting point for tighter virtual-camera moves and hero action, with heavier storage and editing demand. |
| Everyday 360 ride | Panoramic | 6K60 | Preserves the full 360° workflow while reducing pressure compared with 8K60. |
| Fast flat POV | Single-Lens | 4K60 | Direct 16:9 footage for a conventional timeline; no panoramic reframe required. |
| Slow-motion detail | Dedicated slow-motion family | 4K120 Single-Lens Boost or supported 4K Panoramic Slow Motion | Use briefly for a sprint, jump or wheel detail; telemetry auto-alignment has a limitation on slow-motion clips. |
8K describes the whole 360° sphere, not the resolution of every flat crop. For the full resolution trade-off, use the 8K60 vs 6K60 vs 4K settings guide. For high-frame-rate choices, see the Osmo 360 II slow-motion guide.
One activity, several edits
How to Turn One Ride Into Reels, Shorts & YouTube Videos
Use 360° for the ride-defining moments, then build each platform edit around its own framing and pace.
For a longer video, mix a forward Single-Lens POV with two or three strong third-person 360° angles. A short social edit can revolve around one climb or corner plus a simple speed, power or cadence overlay—if that value was actually recorded. The complete mobile and desktop routes are covered in the Osmo 360 II Editing Guide.
Protect the rider, camera and edit
Common Cycling Camera Mistakes
Most failures begin before the first frame: the wrong mount, unsynchronized clocks or a mode chosen without a deliverable.
Build only what the ride needs
Recommended Cycling Accessories
The camera and exact 1 m Invisible Selfie Stick below have direct SpeedyDrone routes. Choose every mount by its documented surface and safety limits.

Plan the Capture System Around the Ride
The Standard Combo is the starting point for the two workflows in this guide: panoramic 8K60 or 6K60 footage for reframing, and conventional Single-Lens recording for a faster flat-video edit. The replaceable-lens design is relevant to a camera used around grit and trail debris, but replaceable and scratch-resistant do not mean damage-proof.
Choose it when one ride needs flexible POV, third-person and vertical outputs—not because every kilometre should be recorded at the maximum setting.

Extend Only Within the Mount’s Limits
SpeedyDrone carries this exact 1 m carbon-fibre stick. It can create the invisible-support look when it is aligned with the camera’s stitch line and used with an appropriate mount. For a bicycle rear setup, follow DJI’s Bike Rear Mount instructions, use the required second support clamp and stay within the surface, speed, width and local-law limits above.
Frequently asked
FAQ
Short answers to the most important Osmo 360 II cycling setup questions.
Does Osmo 360 II have GPS?
DJI’s current Osmo 360 II specifications do not list built-in GPS. Route, speed, altitude and related Sports Dashboard values come from compatible recorded activity data, such as Garmin Connect or a standard FIT file. Some motion stickers may use supported camera data, depending on the current DJI Mimo and camera combination.
How does DJI Sports Dashboard work?
Record the ride on a compatible sports device while filming with Osmo 360 II. In DJI Mimo, open the original camera clip, enter Dashboard, import or connect the matched activity and select the metrics and sticker design you want to display.
Can I import Garmin data into DJI Mimo?
Yes. DJI’s current support includes Garmin Connect integration for the Osmo 360 series, and you can also use a standard FIT file. Match the date, time and time zone before riding, start the Garmin activity before filming and stop it after filming.
Can Sports Dashboard show power and cadence?
Yes, when power and cadence are present in the imported activity. A bike computer cannot supply values it did not record, so you may need a paired power meter and cadence sensor. Heart rate likewise requires a recorded heart-rate source.
Does Osmo 360 II support HorizonSteady?
Yes. DJI lists HorizonSteady and RockSteady 3.0. For Panoramic Video, stabilization is selected on export in DJI Mimo or DJI Studio. In Single-Lens recording, HorizonSteady support depends on the mode, aspect ratio, FOV and frame rate.
Is RockSteady or HorizonSteady better for cycling?
HorizonSteady is a strong default for level, easy-to-watch road footage. RockSteady keeps more of the rider’s lean and terrain response, which can feel more natural for mountain biking or dynamic POV. Test the look on a short clip before the main ride.
How do I get third-person cycling shots?
Record in 360° with a properly aligned invisible selfie stick and a secure mount approved for the riding surface, then reframe around the cyclist. For rough trails, use a low-profile mount or a safely placed stationary pass-by instead of a long rear extension.
Can I mount an Invisible Selfie Stick behind my bike?
Yes, with DJI’s compatible Bike Rear Mount Kit and within its instructions. DJI requires the rear fixing clamp, prohibits relying on the seatpost mount alone, limits the setup to flat-road riding, recommends no more than 60 km/h and says not to use it on mountain or muddy terrain.
Is 8K60 worth using for cycling?
It is worth using for important panoramic clips that need maximum reframing room, especially a hero corner, sprint or third-person sequence. For everyday 360° riding, 6K60 is often the more efficient choice. 8K is the entire sphere, not the resolution of every flat crop.
Should I use 360° or Single-Lens mode for cycling?
Use 360° when the direction may change, you want third-person framing or one clip must support both vertical and horizontal edits. Use Single-Lens when the forward composition is already known and a quick conventional edit matters more.
Sources and Verification Notes
Panoramic and Single-Lens resolutions, stabilization behaviour, storage and stitching distance were checked against DJI’s current Osmo 360 II specifications. Sports Dashboard fields, service-linked data, manual FIT import, timing and Time Alignment limits were checked against DJI support. Bike rear-mount compatibility and every safety limit quoted above were checked against DJI’s official product instructions.
DJI Osmo 360 II Specifications
DJI manual FIT import instructions
DJI third-party sports data instructions
DJI Osmo Bike Rear Mount Kit
DJI Osmo 360 II launch announcement
Setup recommendations, Canada examples and mode choices are SpeedyDrone editorial analysis, not claims of first-hand testing at the named locations. Mount condition, terrain, speed, rider skill, local law, firmware and app versions can change the result. Stop in a safe place before operating the camera or app, and recheck the current accessory instructions before riding.
Build the right ride, not the biggest rig
Build Your Osmo 360 II Cycling Setup in Canada
Start with the camera, then add only the storage, power and surface-appropriate mounts required for your road or trail plan.


