


The master setup guide
Best DJI Osmo 360 II Settings: 8K/60, SuperNight 2.0, D-Log M & Motion Blur Explained
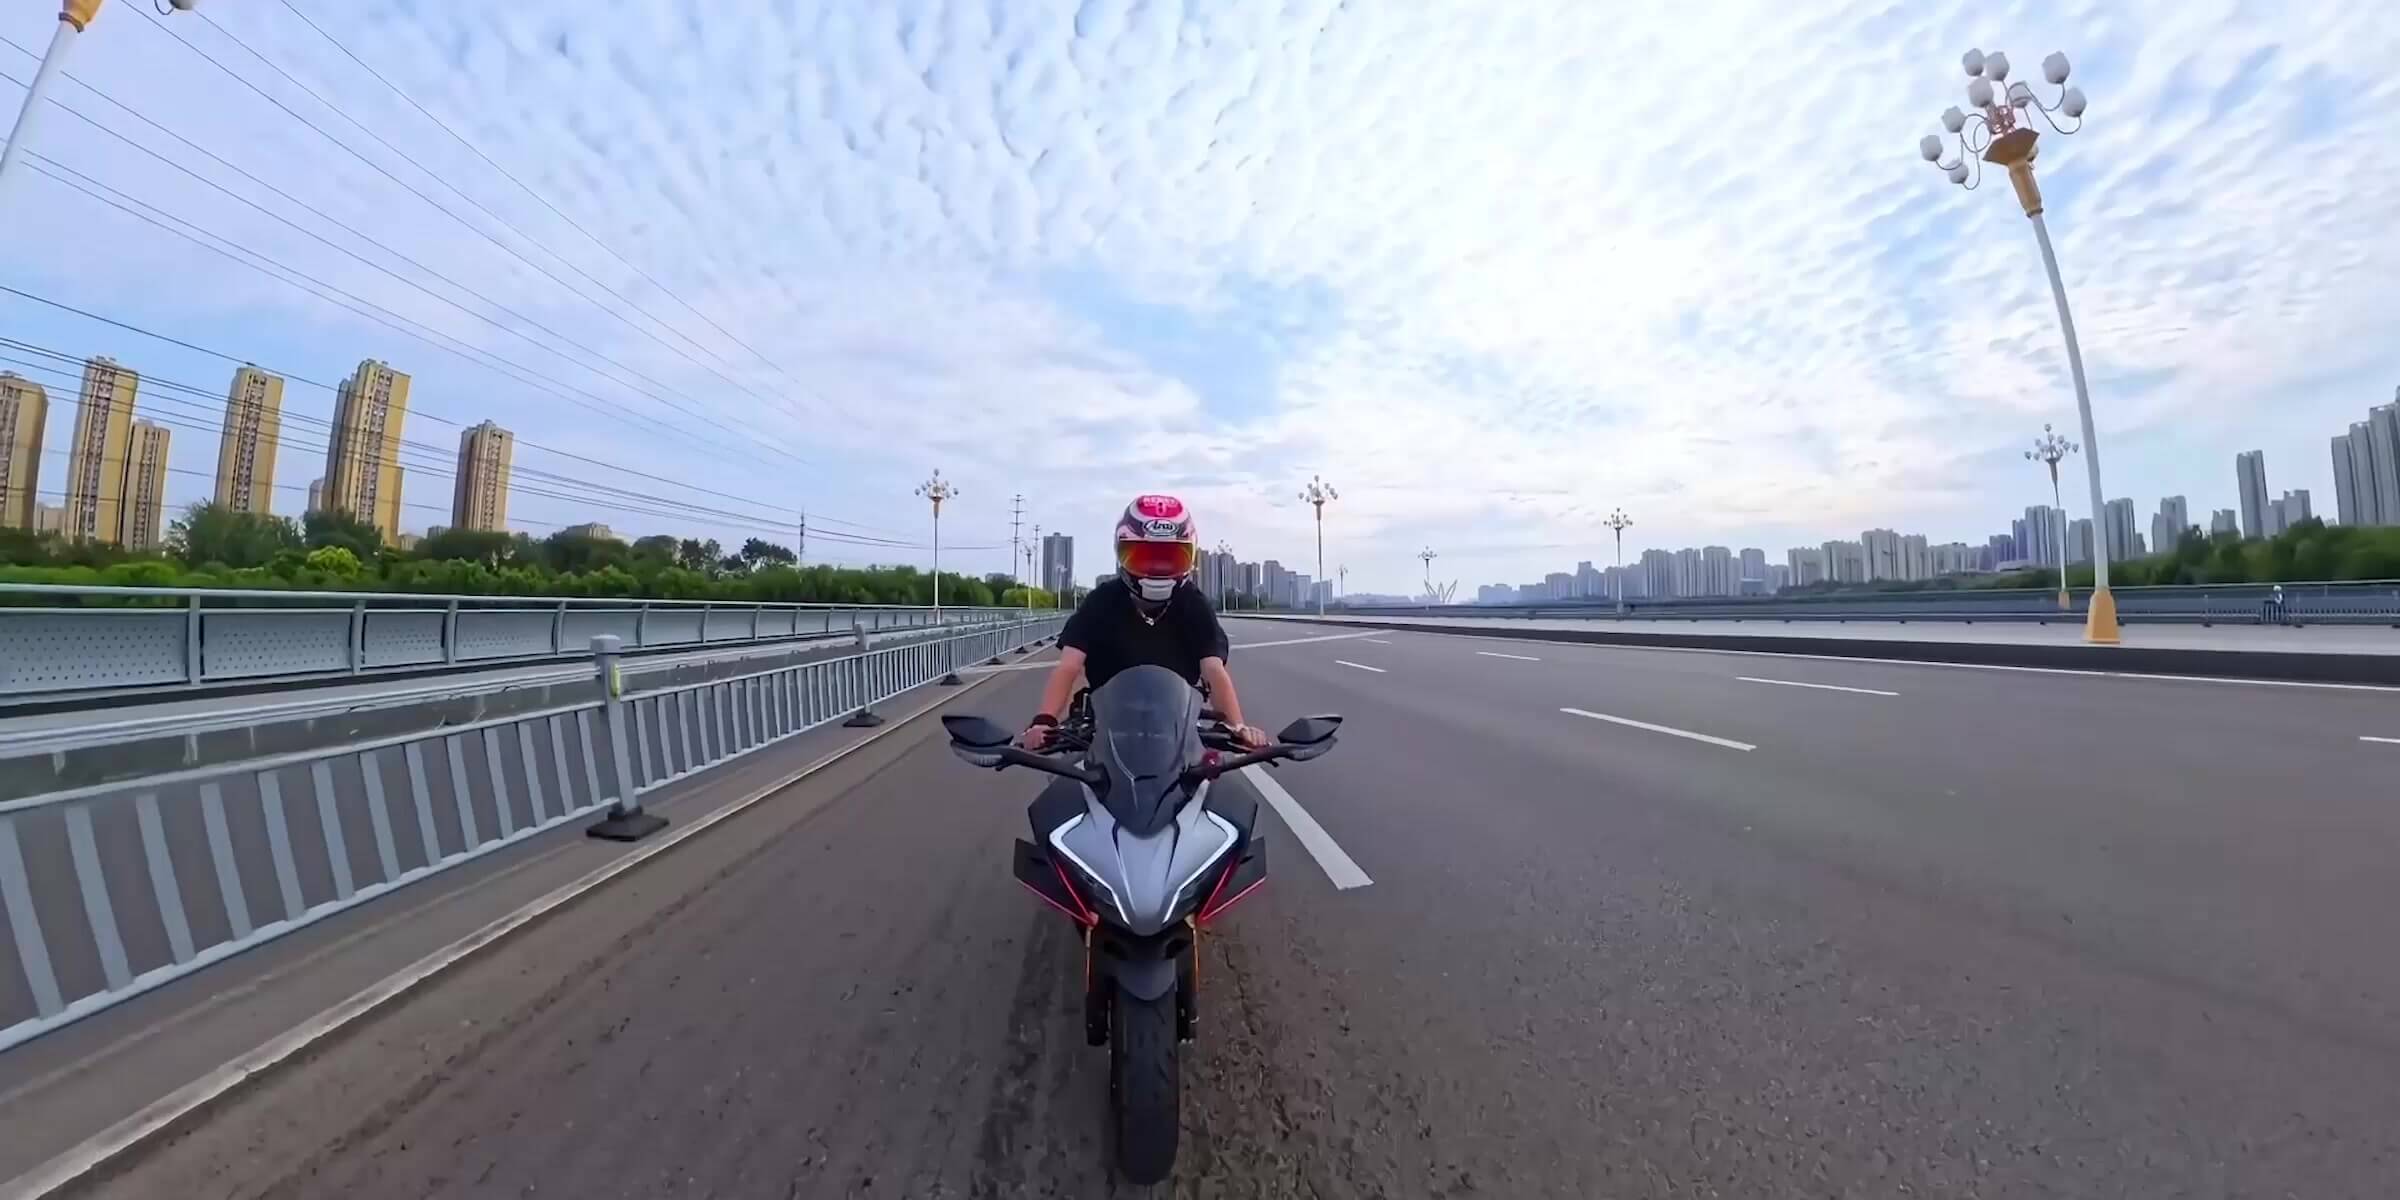
The best all-purpose starting point is 360° 8K/30fps in Standard 10-bit colour. Move to 8K/60 when fast motion or a 2× slow-down matters; use SuperNight 2.0 when low light is the main problem; and choose D-Log M only when the project will actually be colour graded. Motion Blur is a creative finishing effect, not a rescue tool for soft capture.
Choose by scene
Quick Answer: Best Osmo 360 II Settings by Scenario
This is a starting-point table, not a promise that one preset will survive every light change, mount or export.
Swipe to see every column.
| Scenario | Capture mode | Starting setting | Colour | Why | Watch for |
|---|---|---|---|---|---|
| Daytime travel | 360° | 8K/30fps | Standard 10-bit | Maximum reframing detail with a simpler finished-looking file | Mixed indoor/outdoor WB shifts and long-recording heat or storage load |
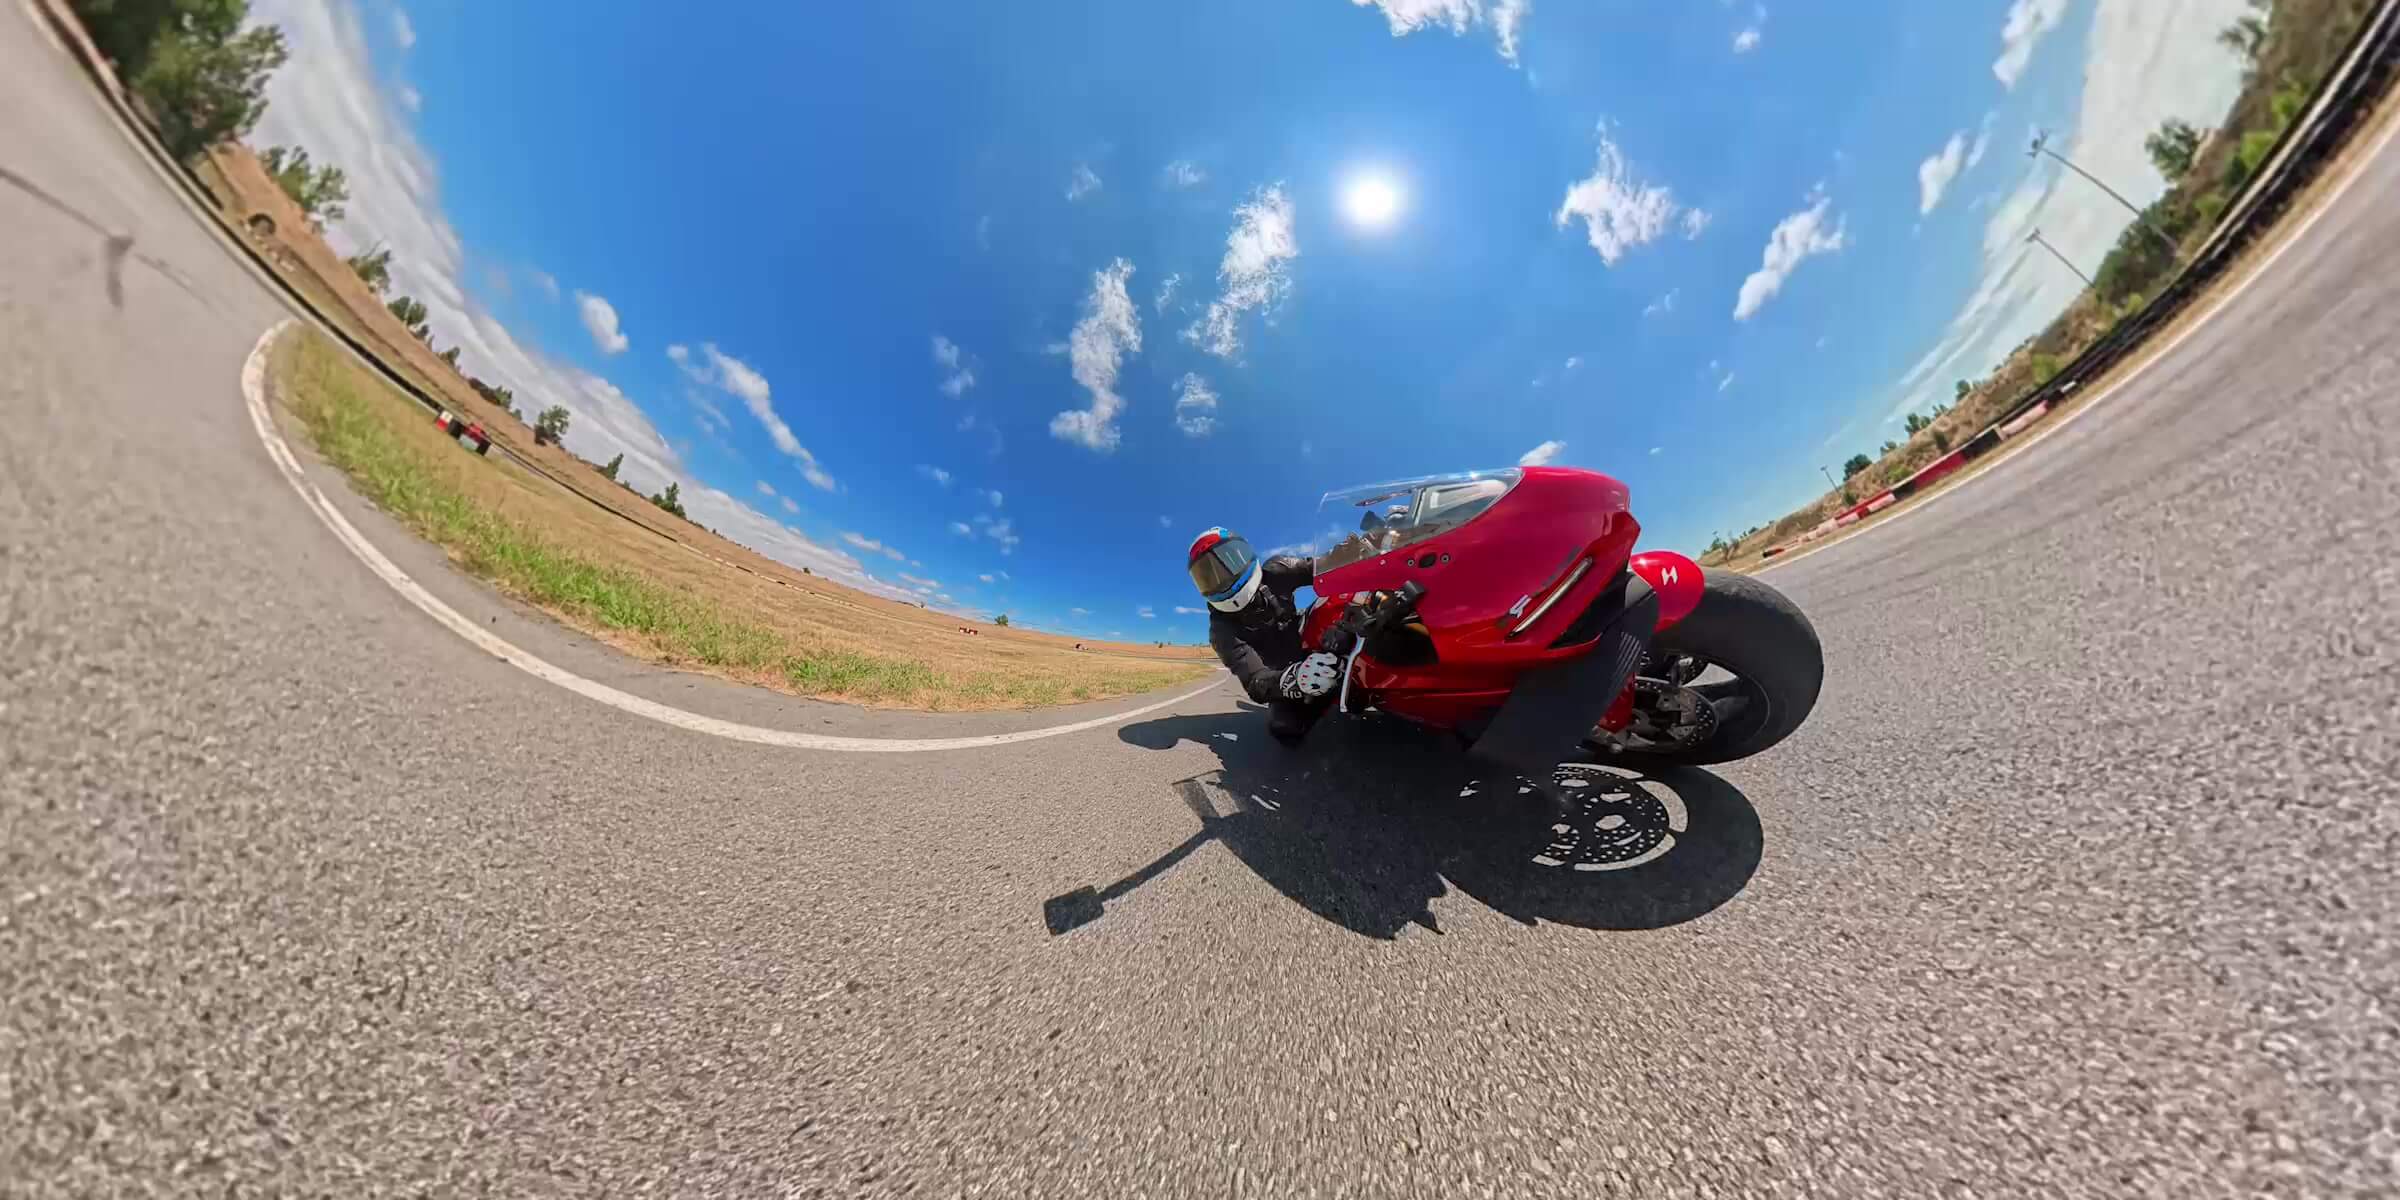
| Cycling / motorcycle | 360° | 8K/60fps | Standard or D-Log M | Smoother fast motion and optional 2× slowdown on a 30fps timeline | Low light, vibration, unsafe mounting and over-slow shutter |
| Skiing | 360° | 8K/60fps | Standard or D-Log M | Fast-motion coverage with later angle choice | Snow highlights, cold batteries, lens contamination and motion-blur overuse |
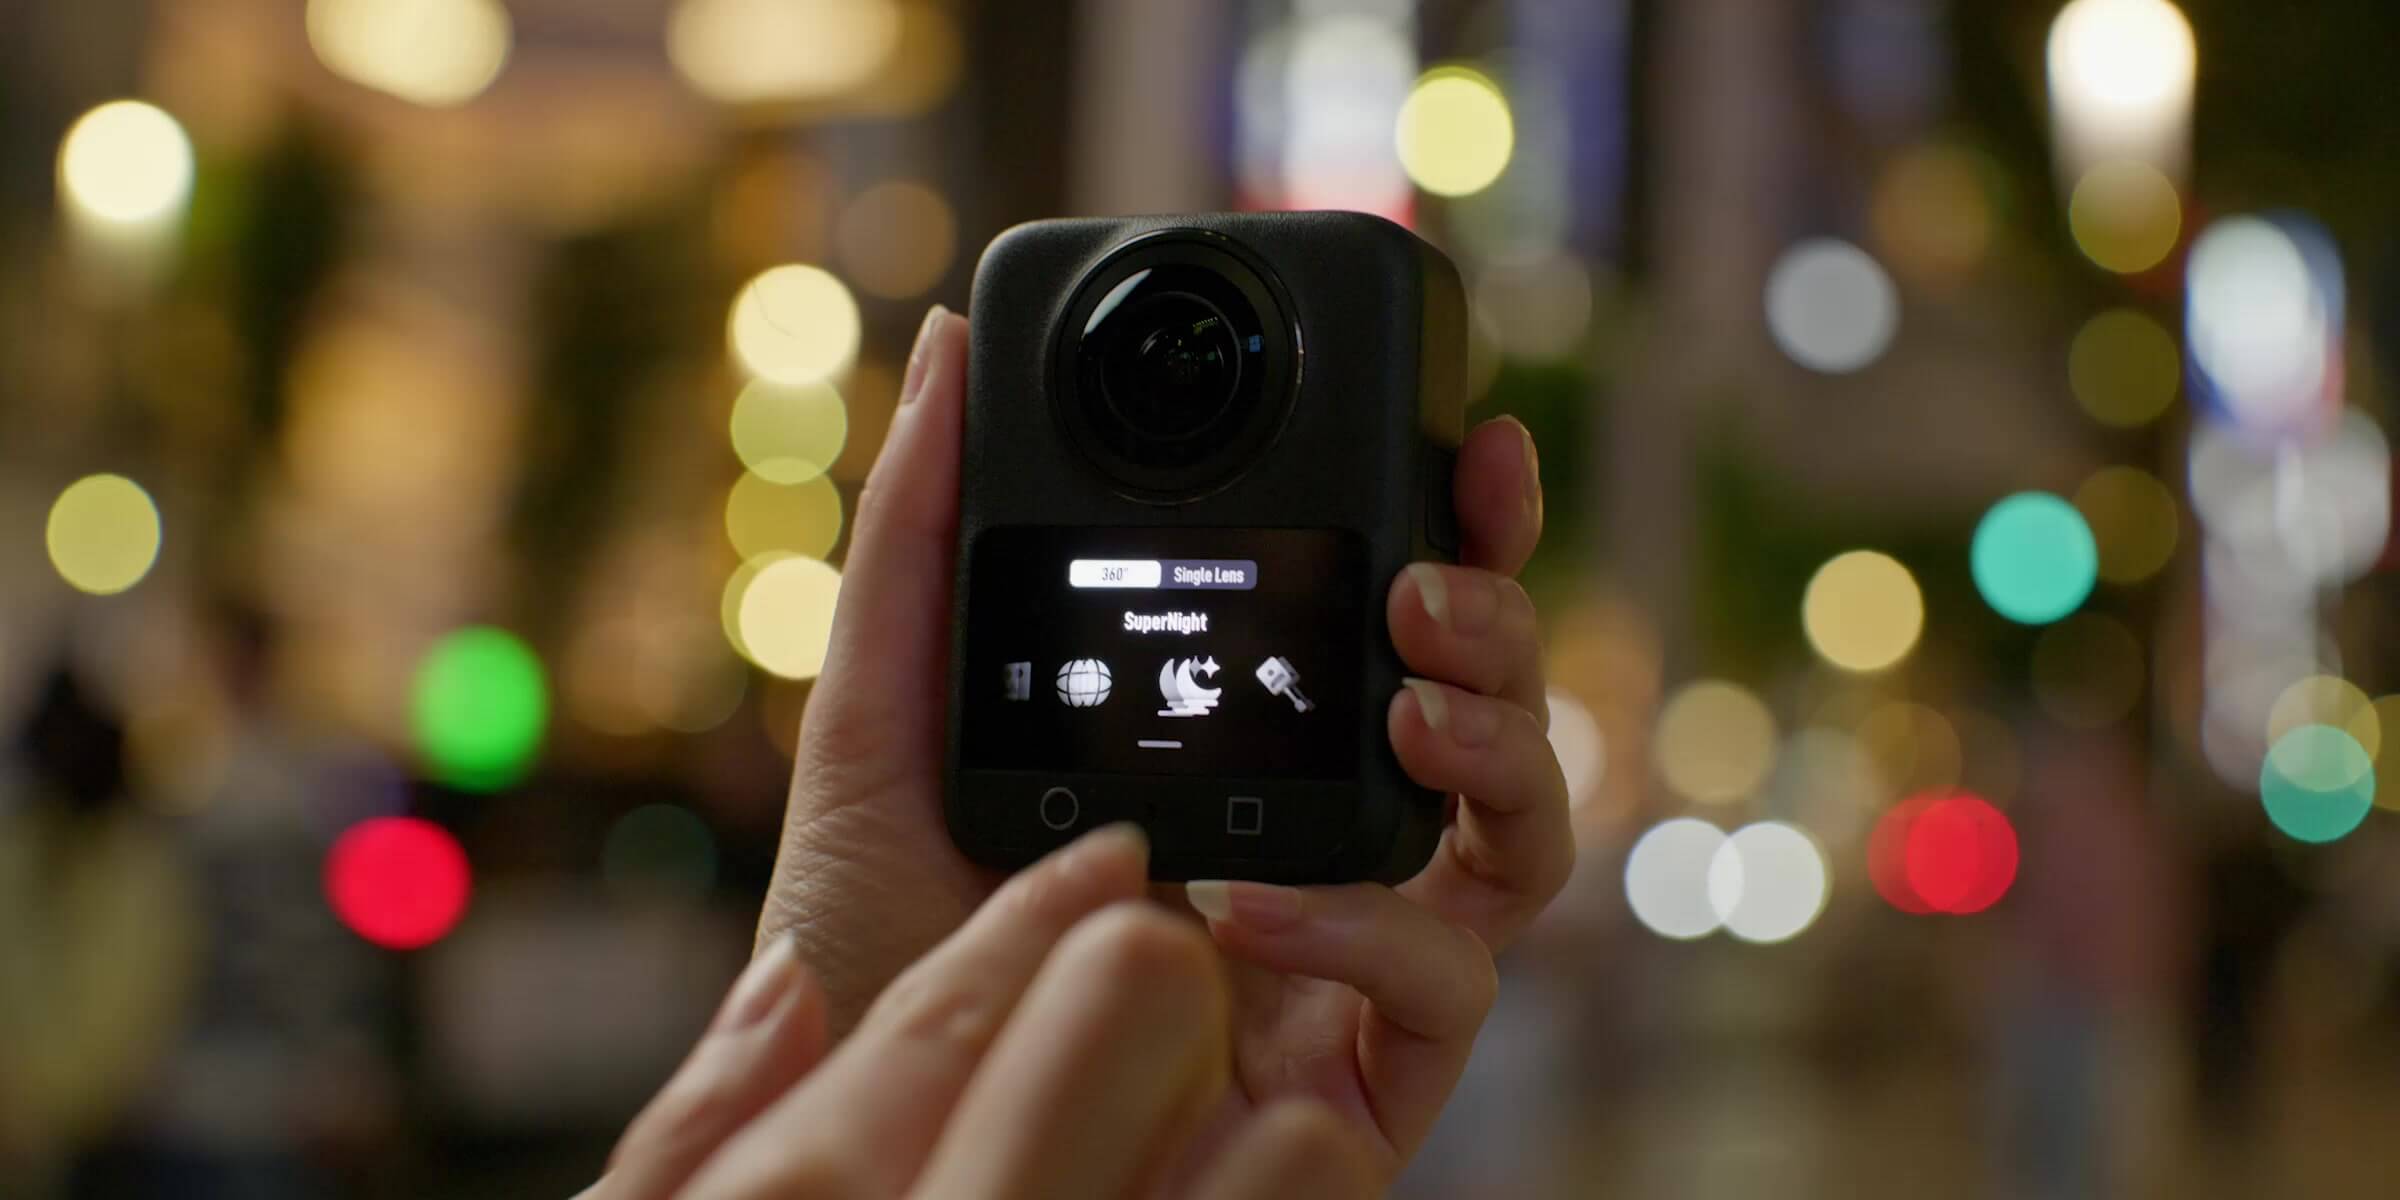
| Night city | 360° SuperNight | Begin at 8K/30fps | Use the available SuperNight colour choice | Prioritizes DJI's dedicated low-light noise-reduction workflow | Moving subjects, blown signs and unrealistic expectations in near-darkness |
| Sunset / high contrast | 360° | 8K/30fps | D-Log M if grading | More deliberate exposure and colour workflow | Clipped sun, lifted noisy shadows and changing auto white balance |
| Reels / Shorts | Single-Lens Boost 9:16 if the angle is known; otherwise 360° | 4K/30 or 4K/60 flat; 8K/30 or 8K/60 panoramic | Standard for speed | Direct vertical capture is fast; 360 keeps post-shot angle freedom | Committing to the wrong lens or orientation too early |
If you remember one rule: resolution protects crop flexibility, frame rate protects motion flexibility, colour mode protects grading flexibility, and SuperNight protects low-light usability. They solve different problems.
Frame rate is a motion decision
8K/30 vs 8K/60: Which Should You Use?
Both settings record the full 360° sphere at 7680×3840. That does not mean every flat export becomes an 8K conventional video: reframing selects only part of the sphere, so the final detail depends on crop, field of view and export settings.
Use 8K/30 as the default for travel, walking, landscapes, real estate walkthroughs, family days and longer takes where action is moderate. Thirty frames per second leaves more exposure time available per frame than 60fps, and it avoids collecting twice as many temporal samples when you do not need them. It is also the exact mode DJI uses for its published maximum 100-minute continuous-recording laboratory reference; real runtime changes with temperature, screens, wireless features and other settings.
Use 8K/60 for speed: motorcycle passes, cycling, skiing, rapid camera movement and action that may be slowed to half speed on a 30fps timeline. DJI's benefit is temporal resolution—more moments sampled each second—so movement can look smoother and a 2× slowdown remains based on captured frames. It is not a universal image-quality upgrade. In darker light, 60fps can force shorter exposure times or higher sensitivity, and the larger processing and storage load may not help a static scene.
Default for most people
8K/30
- Travel, views and normal walking
- Longer continuous takes
- Low-light starting point before SuperNight
- Maximum spatial detail without an unnecessary high frame rate
Use when motion earns it
8K/60
- Fast sports and vehicle footage
- Smoother real-time playback
- 2× captured slow motion on a 30fps timeline
- Easier frame-rate matching with other 60fps cameras
For the full capture-mode breakdown, use our Osmo 360 II 8K60 vs 6K60 vs 4K guide.
Do not treat every number as one ladder
Where 6K and 4K Fit
6K is the lighter panoramic option. Normal 360° video supports 6000×3000 at the same listed 24/25/30/48/50/60fps range as 8K. Choose it when the final crop is modest, the project is storage-sensitive, or your editing hardware handles 6K more comfortably. It sacrifices source pixels, not 360° coverage.
4K is not a normal panoramic resolution tier on Osmo 360 II. It appears in other mode families: Single-Lens flat video, Single-Lens Boost, Spotlight Follow, Selfie mode and dedicated panoramic Slow Motion. If you already know the lens direction and final aspect ratio, Single-Lens can save the reframing step. If the important action could happen anywhere, stay in 360° and accept the heavier post workflow.
Our Single-Lens vs 360° Mode guide makes that choice before you press record.
A dedicated low-light tool
When to Use SuperNight 2.0
SuperNight is for scenes where noise and limited light are the central problem—not simply any clip recorded after sunset.
Osmo 360 II's panoramic SuperNight mode is listed at both 8K and 6K from 24 through 60fps. DJI describes the mode as using an AI noise-reduction algorithm for low-light scenes. The manufacturer's own footnote recommends it for night scenes above 10 lux, which is an important boundary: SuperNight is not a promise of clean footage in near-total darkness.
Use it for night streets, illuminated events, city viewpoints and other scenes with enough practical light to define faces and edges. Start at 30fps when motion is manageable; move to 60fps only when faster action justifies the shorter exposure window and the available light supports it. Watch bright signs and headlights—the night mode cannot recover highlights that were clipped at capture.
Do not assume every colour profile and mode can be stacked. DJI's support note says Single-Lens SuperNight supports Standard 10-bit colour only. Treat the on-camera menu and current firmware as the authority for any specific combination.
SuperNight vs normal video: use SuperNight when low-light noise reduction is the priority. Use normal video at night when motion rendering, a specific colour workflow or consistent cross-camera matching matters more—and test both before an unrepeatable scene.
Colour depth and colour profile are different
Standard 10-bit vs D-Log M
Ten-bit is the precision of the recorded colour values. D-Log M is a flatter picture profile designed for post-production.
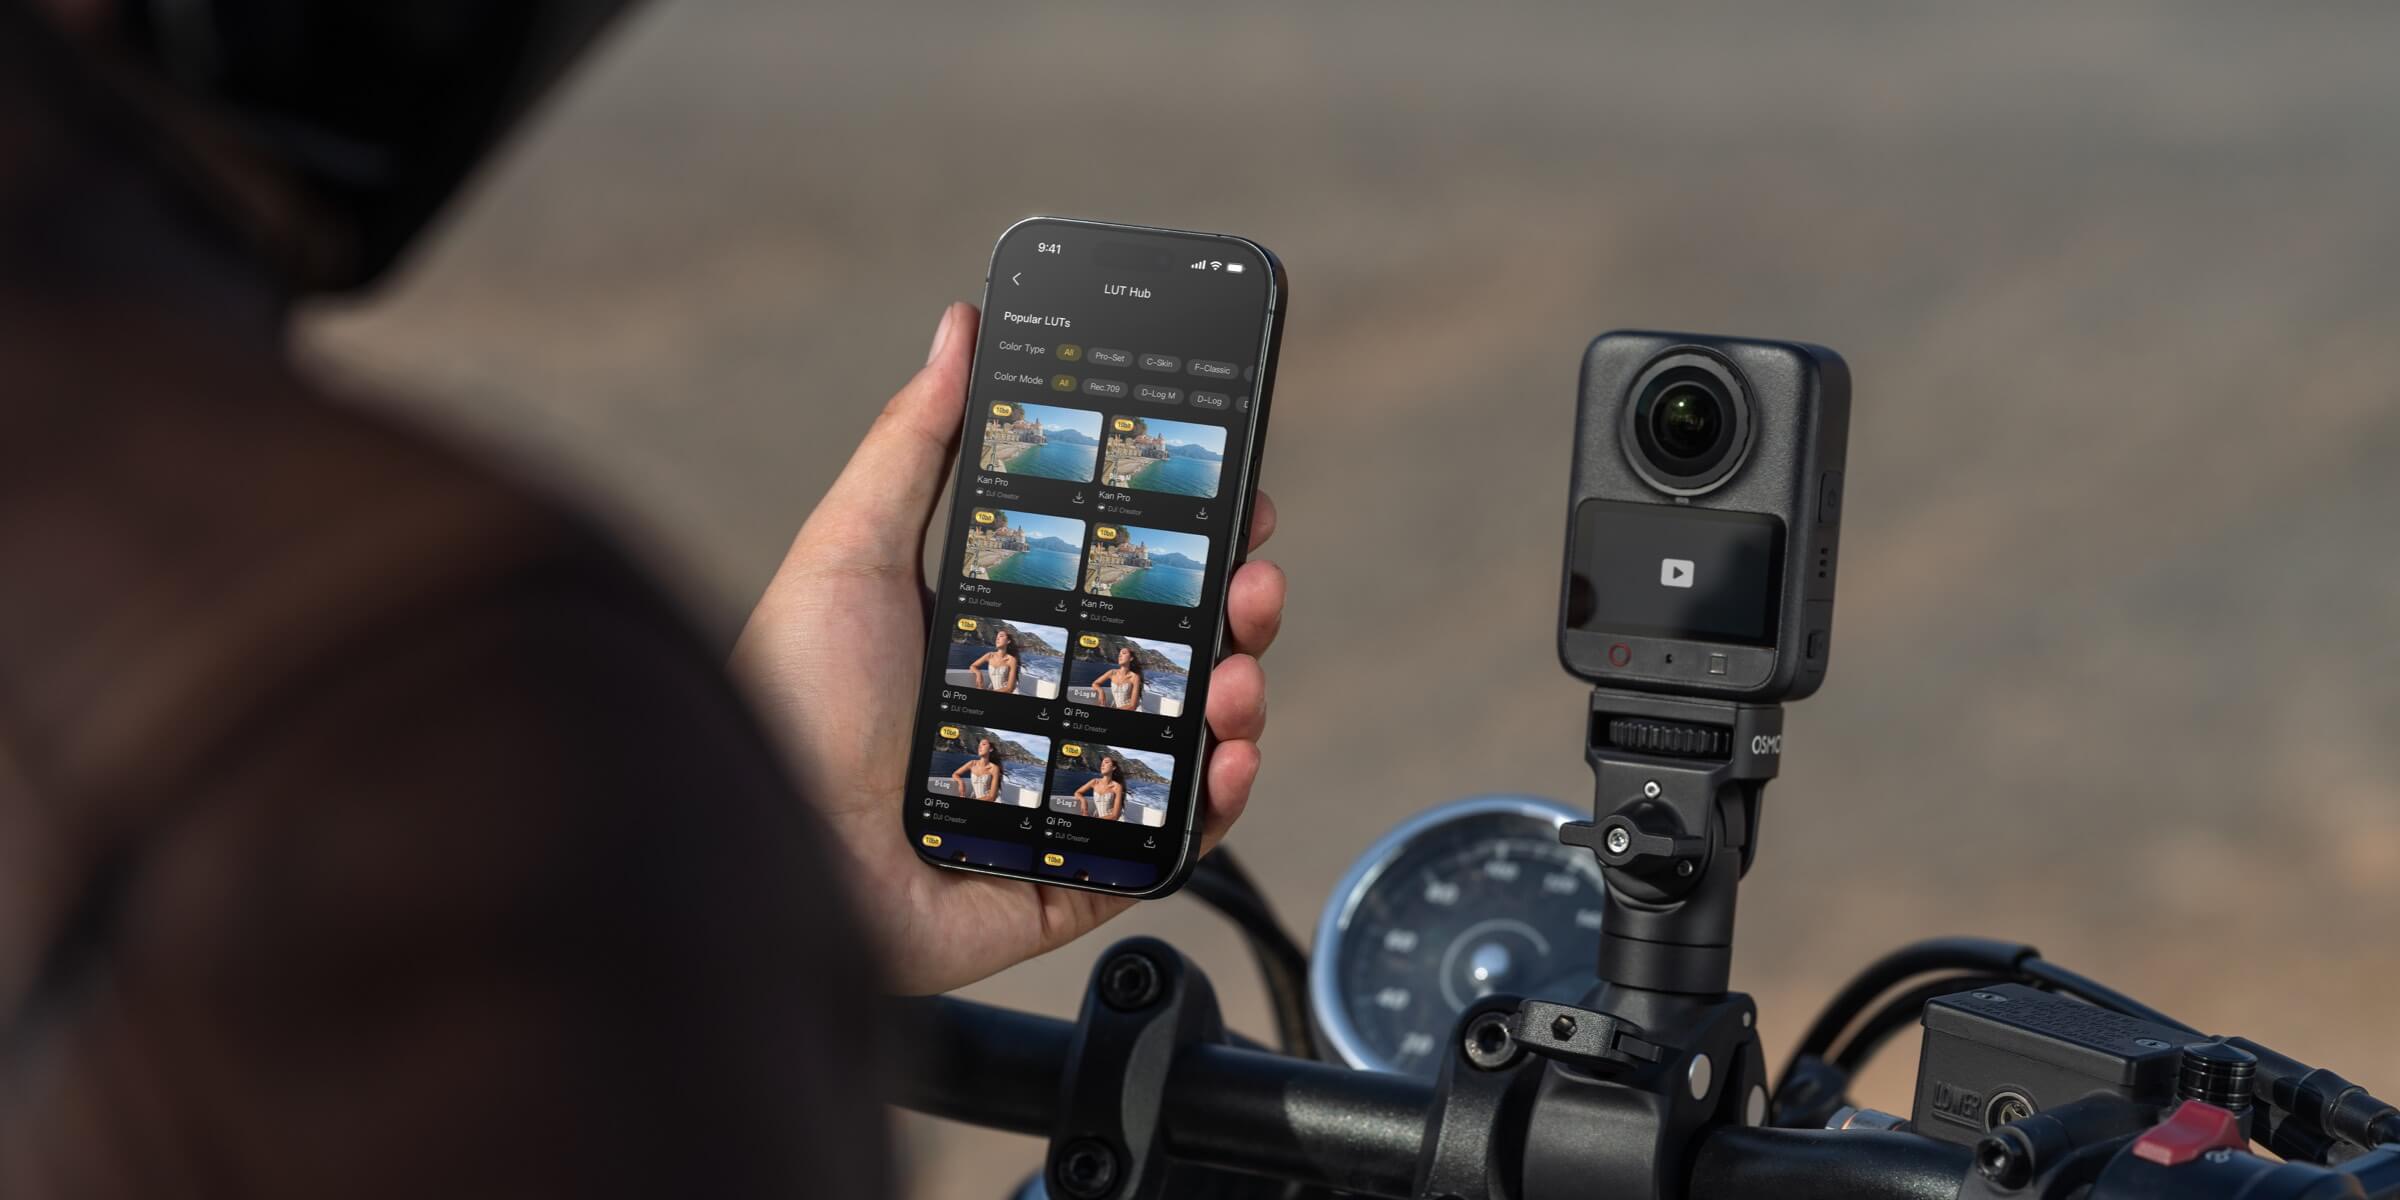
DJI says D-Log M is not supported in Photo, Timelapse or Endurance Mode. When D-Log M is enabled, Adaptive Tone and Film Tone are unavailable. Those restrictions matter because selecting D-Log M changes the workflow; it does not simply switch on “better colour.”
If you will not grade, Standard is usually the better setting. A flat D-Log M clip exported without the appropriate conversion can look washed out. Conversely, Standard does not become 8-bit just because it looks finished. Read the complete Osmo 360 II D-Log M guide before committing a full trip or paid shoot to that profile.
The common terminology trap
10-bit Is Not the Same as D-Log M
Ten-bit recording provides 1,024 code values per colour channel instead of 256 in an 8-bit signal. In practical editing, that can give gradients and colour adjustments more room before visible stepping appears. It does not guarantee that a display, social platform or final compressed file will preserve every advantage.
D-Log M describes how brightness and colour are encoded into that container. It deliberately starts lower in contrast and saturation so an editor can shape the image. Therefore, “10-bit” answers how finely values are recorded; “D-Log M” answers which colour profile is used. You can have Standard 10-bit footage, and Osmo 360 II does.
Capture blur vs finishing effect
What Motion Blur Actually Does
There are two different ideas hiding under the same phrase. Natural motion blur comes from the shutter being open while the subject or camera moves. DJI's Motion Blur is presented as a creative post-production effect that can add a sense of speed to footage such as a skiing run.
The effect can make a clean, well-tracked shot feel faster. It cannot make a missed focus sharp, undo vibration, restore detail smeared by an excessively slow shutter or fix a bad stitch. Start with stable, readable footage and add only enough blur to support direction and speed. If the viewer can no longer see the athlete, road edge or important background reference, the effect is doing too much.
When should you add it?
Use it selectively on short skiing, motorcycle, cycling or transition shots where the direction of travel is obvious. Skip it on talking clips, night scenes that already contain long light streaks, product detail, long scenic views and any shot where you need the audience to inspect the environment. For captured high-frame-rate slow motion, finish the timing first and decide on additional blur afterward.
For native and AI-interpolated options, see the Osmo 360 II slow-motion guide.
Five reusable field recipes
Best Osmo 360 II Settings for Travel, Action, Skiing, Night & Reels
Set the mode before the numbers: decide whether you need the whole sphere or a finished flat frame.
For longer planning, use the Osmo 360 II travel guide, cycling guide and Canadian winter guide.
Control only what improves consistency
Auto vs Pro: Which Is Safer?
Auto is the safer default when the camera moves through changing conditions, the operator is part of the action, or missing the moment would be worse than a small exposure shift. That describes most travel, skiing, cycling and family footage.
Pro control earns its place when the light is stable, multiple clips must match, the camera is locked off, or the scene contains a known highlight you want to protect. Manual control does not make a shot professional by itself. A fixed exposure can fail quickly when a skier moves from open sun into trees or a motorcycle enters a tunnel.
Practical hybrid: let exposure react when the scene changes, but lock white balance when colour consistency matters. Then review a short real movement test, not just a stationary preview.
White Balance, Exposure and Shutter Starting Points
Use Auto white balance for unpredictable single clips; use a fixed value for a sequence in consistent light so colour does not drift during a pan or cut. Match the actual environment rather than copying an internet Kelvin number. Snow, mixed LED lighting, sunset and shaded forests all require different judgment.
For exposure, protect important highlights first—snow, clouds, windows, fireworks and signs are difficult to repair once clipped. Raise exposure only after checking whether shadow noise remains acceptable. For shutter, avoid blindly forcing the 180-degree rule during vibration-heavy action. Electronic stabilization needs sufficiently clear frame-to-frame detail; too slow a shutter can create smear that stabilization cannot undo. Faster shutter may look less “cinematic,” but it can preserve readable action. Test on the actual mount at the actual speed.
Stabilize for the delivery
RockSteady 3.0 vs HorizonSteady
For 360° footage, DJI says the stabilization mode is chosen during export in DJI Mimo or DJI Studio.
Keep some terrain character
RockSteady 3.0
Use it when you want vibration reduction while preserving more of the camera's roll and the athlete's lean. It is often the more natural starting point for aggressive mountain biking, motorcycle cornering and dynamic handheld movement.
Hold the world level
HorizonSteady
Use it when a level horizon matters more than preserving roll—road cycling, walking, skiing follow shots and horizon-sensitive travel footage. Review the crop and subject position after export rather than assuming horizon lock solves composition.
In Single-Lens normal flat video, DJI limits HorizonSteady to Standard FOV, 16:9, distortion-corrected footage at up to 60fps. In Single-Lens Boost, HorizonSteady is also limited to 60fps. Those restrictions are another reason to decide the mode before choosing a frame rate.
The settings that most often backfire
Common Osmo 360 II Settings Mistakes
Most problems come from maximizing every option instead of protecting the weakest part of the scene.
One camera, several workflows
Start With the Camera, Then Build the Setting
Osmo 360 II is the useful purchase when you want one capture device to cover panoramic masters, flat Single-Lens clips and vertical reframes.

DJI Osmo 360 II Standard Combo
Choose the Standard Combo when the camera is the priority and you want to add sticks, mounts, batteries or audio around your real shooting plan. Its value is not one “best” mode; it is the ability to switch between detailed 360° capture, direct flat video and scene-specific modes without buying separate cameras for every format.
View the DJI Osmo 360 II Standard Combo at SpeedyDrone Canada or browse the Osmo 360 collection.
Frequently asked
Osmo 360 II Settings FAQ
Direct answers for the choices that usually slow down a shoot.
What are the best overall DJI Osmo 360 II settings?
For general daylight use, start with 360° 8K/30fps, Standard 10-bit colour and Auto exposure. Use a fixed white balance when several clips must match. Change the preset only when motion, light, grading or a known delivery frame gives you a reason.
Should I use 8K/30 or 8K/60 on Osmo 360 II?
Use 8K/30 for most travel, scenery, walking and longer takes. Use 8K/60 for fast action, smoother motion or a 2× slowdown on a 30fps timeline. Both record the 360° sphere at 8K; 60fps is mainly a motion advantage, not an automatic quality upgrade.
Should I always shoot Osmo 360 II at 8K/60?
No. In moderate or static scenes, 8K/60 adds processing, storage and exposure demands without necessarily improving the finished story. Keep it for action and slow-motion flexibility; use 8K/30 or 6K when those demands are unnecessary.
What is the best Osmo 360 II night setting?
For an illuminated night city, begin with 360° SuperNight at 8K/30fps, protect bright signs and test real subject movement. SuperNight is designed for low-light noise reduction, but DJI recommends it for scenes above 10 lux and it cannot recover clipped highlights or create detail in near-total darkness.
Is D-Log M better than Standard colour?
D-Log M is better when you will deliberately convert and grade the footage or match other cameras. Standard is better for fast delivery and creators who want a finished-looking starting image. Neither is universally superior; the editing plan decides.
Is D-Log M the same as 10-bit?
No. Ten-bit describes colour-value precision, while D-Log M is a separate flatter colour profile. DJI says every Osmo 360 II video format supports 10-bit colour, so Standard footage can also be 10-bit.
Do all Osmo 360 II video formats support 10-bit colour?
DJI states that every video format supports 10-bit colour depth. That does not mean D-Log M is available in every mode: DJI excludes it from Photo, Timelapse and Endurance Mode, and other mode-specific combinations should be checked on current firmware.
What does the DJI Motion Blur effect do?
It is a post-production creative effect intended to add a stronger sense of movement and speed. It is different from natural shutter blur at capture and cannot fix missed focus, vibration, bad stitching or footage that is already excessively smeared.
What settings should I use for motorcycle or cycling footage?
In good light, start with 360° 8K/60fps, Standard colour for fast delivery or D-Log M for grading, and choose stabilization during export. Test vibration and shutter behaviour on the real mount, and never let the camera setup compromise control or safety.
What settings should I use for skiing and vertical Reels?
For skiing, start with 360° 8K/60fps, protect snow highlights and choose stabilization after capture. For a known vertical composition, Single-Lens Boost supports direct 9:16 capture; if the action direction is uncertain or you want several edits, record 360° and reframe to 9:16 later.
Sources and Verification Notes
Resolution and frame-rate families, stabilization restrictions, 10-bit support and D-Log M limitations were checked against DJI's current Osmo 360 II specifications, FAQ and launch materials. SuperNight mode access and Single-Lens colour restriction were checked against DJI Support.
DJI Osmo 360 II Specifications
DJI Osmo 360 II FAQ
DJI Osmo 360 II launch announcement
DJI Support: SuperNight mode
Scene presets, workflow choices and creative recommendations are SpeedyDrone editorial starting points, not controlled performance claims. Features, firmware behaviour, product availability and app export options can change; recheck the exact camera and current software before an important shoot.
Ready to build your own preset?
Shop DJI Osmo 360 II in Canada
Start with the camera and accessories that fit your shooting plan, then choose resolution, frame rate and colour profile for the scene you will actually capture.


